

Je vous donne deux liens pour faire des snood enfant et adultes:
http://www.frichtiweb.com/files/1263318579tutosnood.pdf
http://lapegbidouille.canalblog.com/archives/2009/10/25/15565529.html
Je vous donne deux liens pour faire des snood enfant et adultes:
http://www.frichtiweb.com/files/1263318579tutosnood.pdf
http://lapegbidouille.canalblog.com/archives/2009/10/25/15565529.html
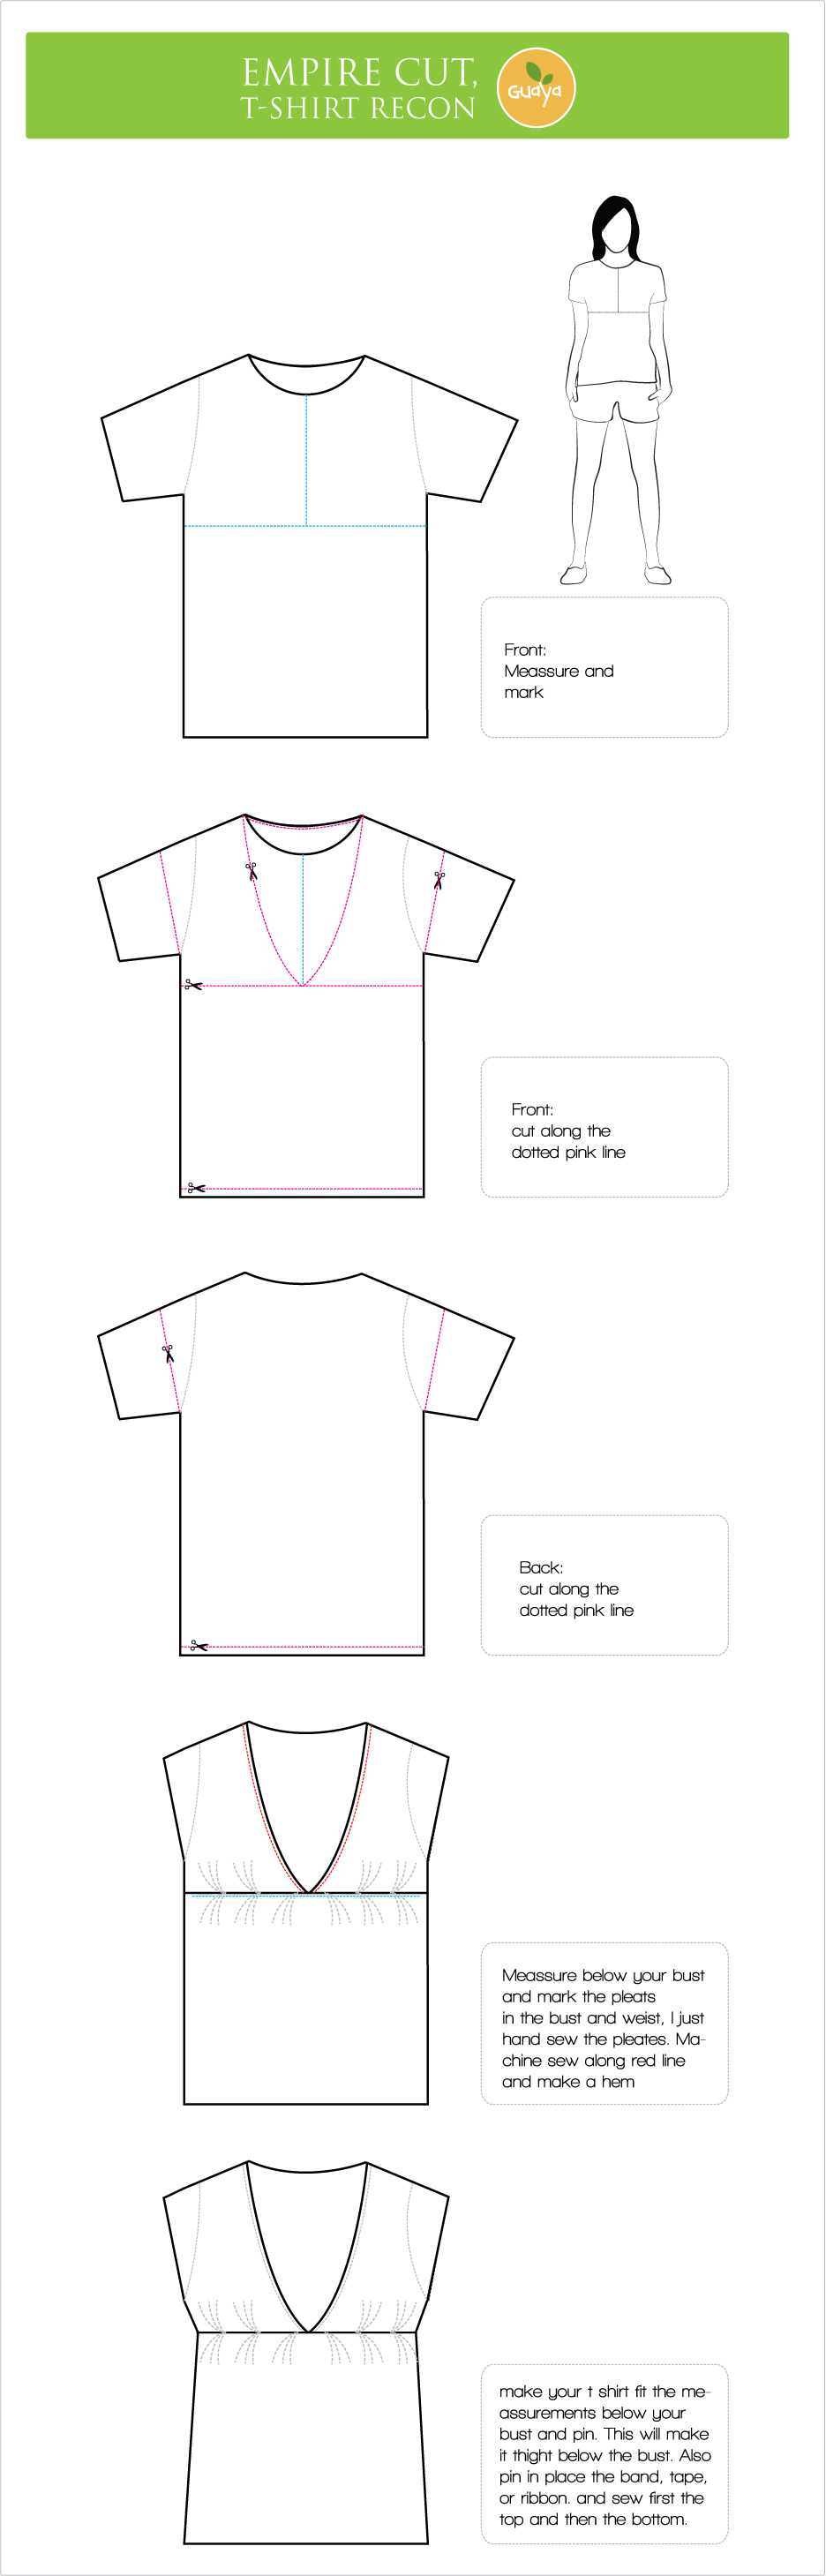
Un tuto super sympa!
Il vous faut des chutes de tissus et un haut de t-shirt!!
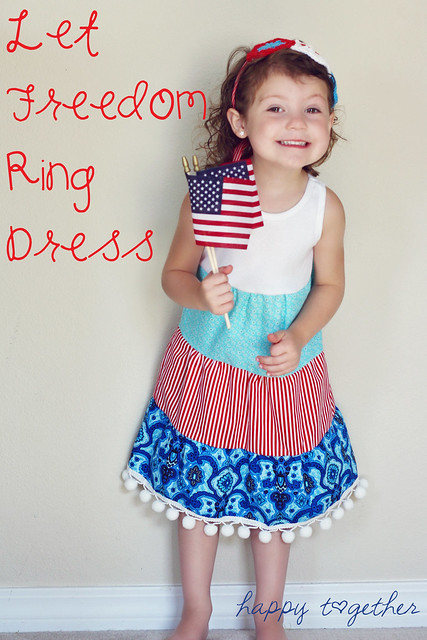
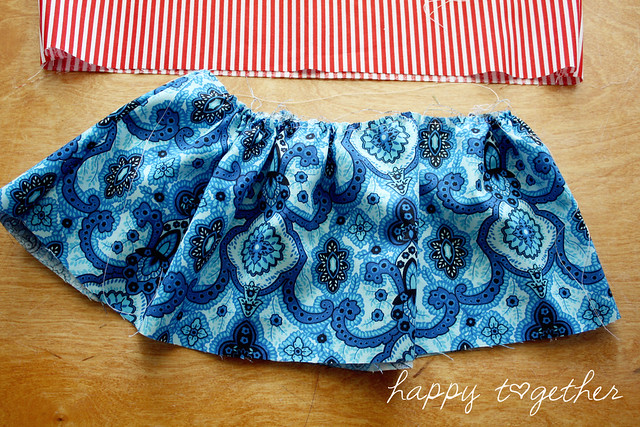
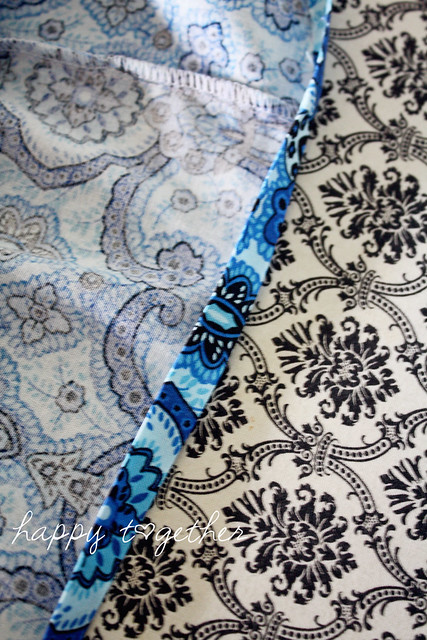
Le tuto de http://ohsohappytogether.blogspot.com/2011/06/let-freedom-ring-dress-tutorial.html
What you will need to make
this dress:
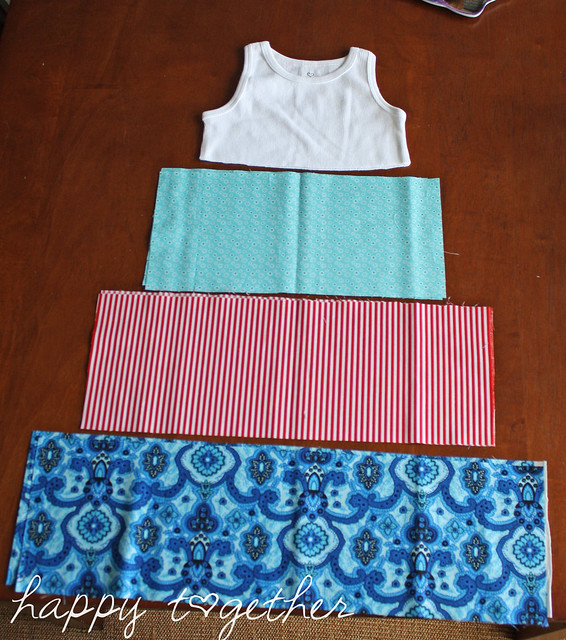
-A knit tank top
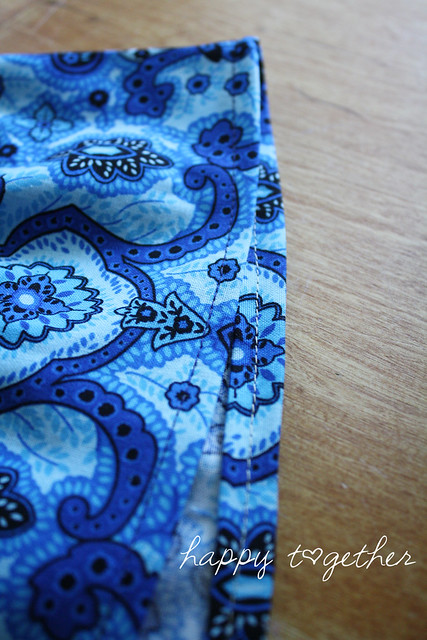
-Fabric for the 3 tiers
-Any additional embellishments you desire (I added a pom pom trim to the bottom).
-All your sewing things
Notes:
-Always back stitch at the beginning and end of sewing, unless otherwise stated.
-Seam allowances are 1/4" unless otherwise stated.
Directions:
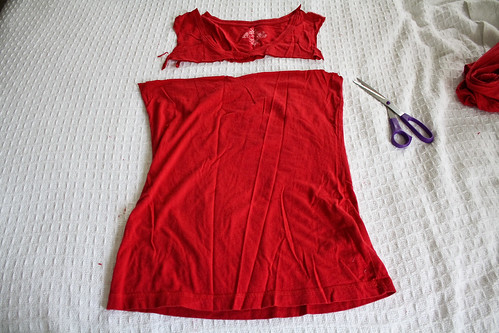
1. Chop off the bottom
of the tank top where you like. Keep in mind to leave a little extra length for the seam allowance for sewing on the first tier.
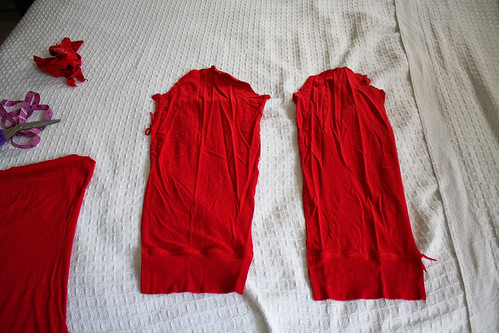
2. Determine the height and width of one piece of the three tiers. You will be cutting two pieces for each.
a. -To determine the height of each layer, decide how much longer you want the dress to come from the bottom of the cut off tank top.
- Then divide that number by 3.
- Add at least .5" for a seam allowance to that number (that would give a .25" seam allowance on the top and on the bottom of the layer). I added 1" for seam allowance just to be on the safe
side.
So, I wanted the length of the three tiers to be 16" long. I divided it by 3 and got 5.33". I rounded it up to 5.5" and added 1", making the height of each tier 6.5".
b. To determine the length of each tier, do the following:
-For the very top tier, measure the bottom of the tank top on one side. Then multiply it by 1.3 and add 1" seam allowance.
*Note: If you want yours more twirly, I suggest maybe starting with the first tier being multiplied by 2 or more.
-For the middle tier, take the length of the first tier and multiply it by 1.3 and add 1" seam allowance.
*Note: Again, if you want it more twirly, multiply by 2 and so forth
-For the third tier, take the length of the second tier and multiply it by 1.3" and add 1" seam allowance.
*Note: Again, if you want it more twirly, multiply by 2 and so forth
It will look like this:
The bottom of the tank top I used was 10.5"
1st tier: (10.5" x 1.3) + 1"= 14.65" (I rounded it up to 14.75")
2nd tier: (14.75" x 1.3) + 1"= 19.175" (I rounded it down to 19")
3rd tier: (19" x 1.3) + 1" = 25.7" (I rounded it up to 26")
Cut 2 pieces for each tier.
Example:
Height x Length
1st tier: 6.5" x 14.75" soit 16.5x38.5
2nd tier: 6.5" x 19" soit 16.5x 48
3rd tier: 6.5" x 26" soit 16.5x 66
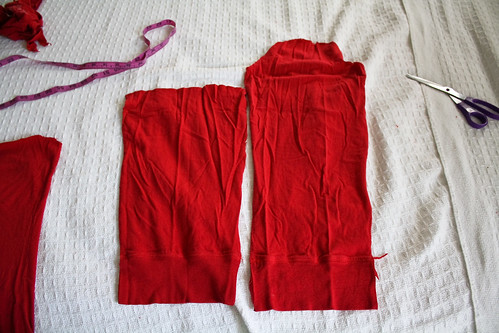
3. Take the two pieces for the 1st tier and place together right sides facing. Sew together down the short sides.
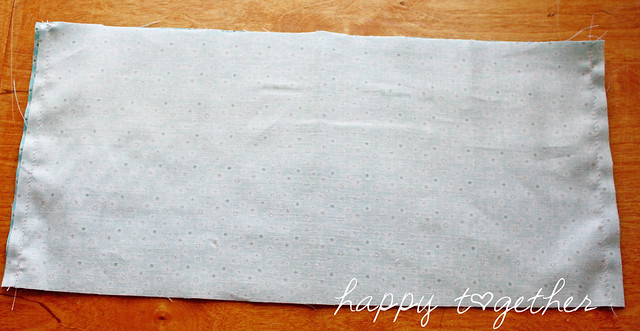
4. Repeat #3 for the 2nd and 3rd tier.
5. Baste (create a long straight stitch, with no back stitching at all) across the top of each layer no further
than 1/4" down. I baste one top side first then the other top side to make it easier to gather.
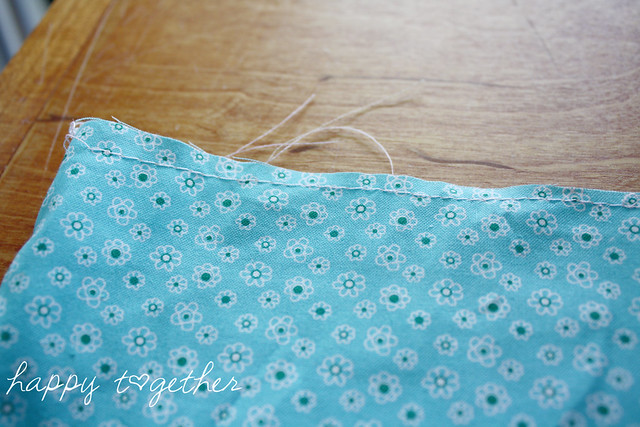
6. Gather (pull the bobbin thread to create a ruffle look) each layer.
7. Place the gathered top of the 3rd tier to the bottom (non gathered edge) of the 2nd tier, right sides facing. Match up the side seams and then even out
the gathers so the 3rd tier fits perfectly to the 2nd. Pin in place.
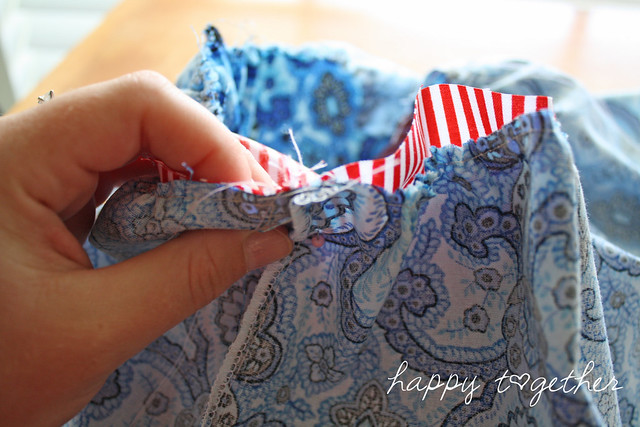
8. Sew together and finish raw edges if you like (go over the edge with a serger or simply use a zig zag stitch that is on a regular sewing machine).
*Tip: I sew a little bit further down from where I gathered so that thread doesn't show on the outside. Then I don't have to try and rip it out so it
doesn't show anymore.
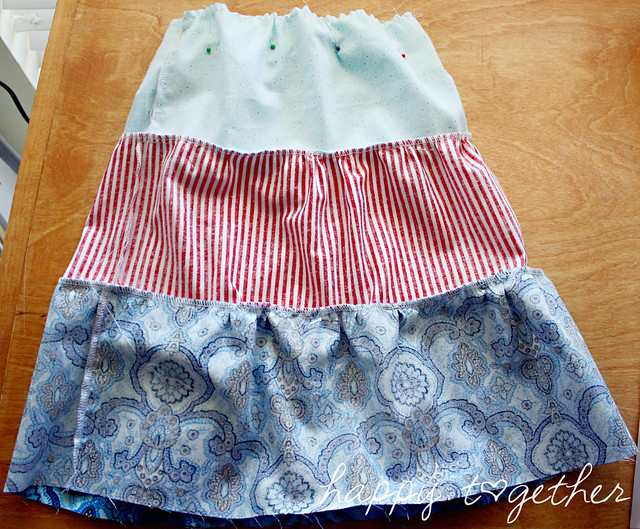
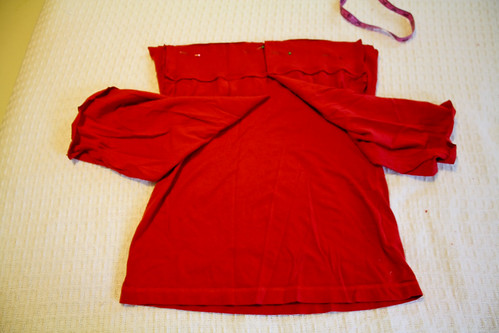
9. Repeat steps #7 and #8 to connect the 2nd tier to the 1st tier and then the 1st tier to the tank top.
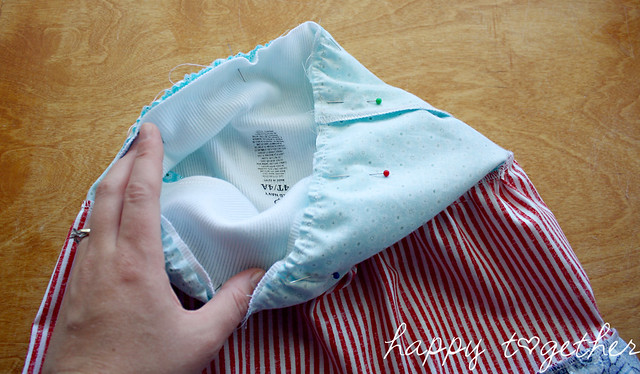
10. Hem the bottom.
a. Turn the bottom up towards the inside 1/4"( 0.60 cm) and iron.

b. Turn the bottom up inside 1/4" again, iron, and pin in place.
c. Sew around the bottom to create the hem.
11. Add any embellishments you like. I added a trim to the bottom, but you could do so much to make it even more fun :)
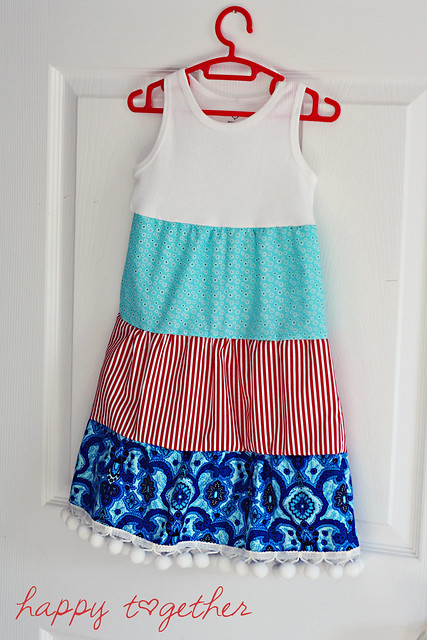
Now if you have a little girl and a little extra time you can easily create a fun new dress for the upcoming holiday or just for everyday play. Enjoy and add your own creation using this tutorial
to the Flickr group to share your take on it with us.
Pour info : un inch = 2,54 cm
Son blog: www.leblogdecam.canalblog.com/
Héhé, vous êtes vraiment nombreuses à aimer le sac à paillettes et la trousse assortie ! Je vous ai promis le tuto du sac, mais comme je ne peux pas le faire d’ici, j’ai dessiné celui de la trousse, nettement plus simple à expliquer sans photo ! Vous allez pouvoir patienter jusqu’au sac, n’est ce pas ?

Donc pour faire la trousse, vous avez besoin de :

Maintenant, il ne vous reste plus qu’à la décliner dans plein de tissus différents … et qu’à attendre le tuto du sac !


Ingredients:
1 large man's shirt
30" x 34" piece of lining fabric
10" x 12" piece of lining fabric
9.5" x 4" piece of medium weight iron-on interfacing (approx)
Thread, sewing machine, pins, ruler!
Method:
1.
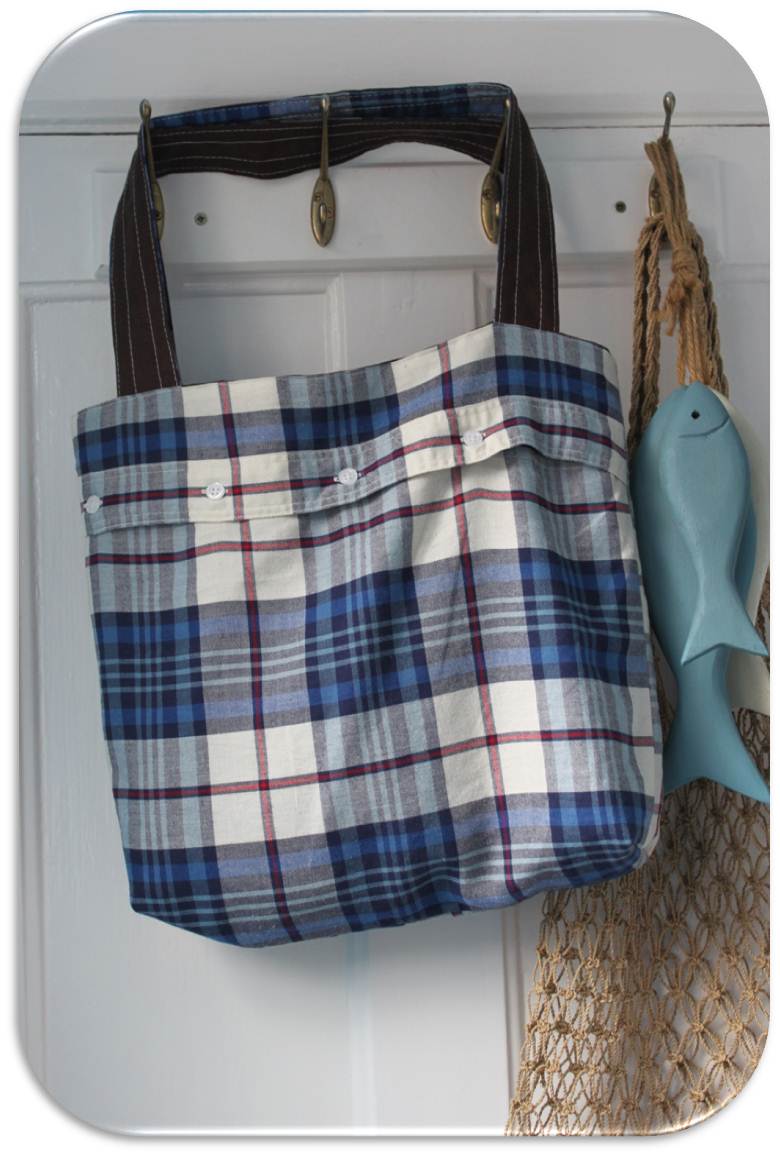
Cut 2 rectangles 15" x 17" (38cm x 43cm) out of shirt. I chose to have the shirt buttons running horizontally across the top of the bag. You can position the buttons as you like. The size of the
rectangles was dictated by the size of the shirt - so choose your size as you see fit.

2.
Cut 2 more rectangles the same size from the lining fabric (I used brown linen)

3. Pocket
A. Cut off one shirt cuff. Cut a rectangle 1.5" (4cm) larger than cuff length. My cuff was 9.5" (24cm) so my pocket piece was 11" (28cm)
long. The depth of the pocket is up to you. I cut mine 9.5" (24cm) which will make the finished pocket about 4.75" (12cm) deep.

B. Pocket Interfacing: Cut a piece of medium weight iron-on interfacing 9.5" x 4"
C. Fold the pocket piece in half and open again. With pocket piece wrong side up, place interfacing on fold line, so that it is about 2cm
from top and positioned centrally, about 2cm away from both sides of pocket piece. Ensure fusible side of interfacing is facing down and then iron in place.

D. Turn pocket piece over so that right side faces up. place cut edge of cuff along top edge of pocket piece (ignore cut corners in the photo
- we will do this later!)

E. Fold pocket piece in half so that cuff is enclosed in pocket and interfacing faces up. Pin in place. Now cut corners!
F. Sew along one open short edge and along top. Leave other short edge open.

G. Turn pocket right side through open side.
H. With fingers, turn raw edges into pocket piece and position pocket in the centre of right side of one lining piece. Pin in place -
make sure pins keep turned-in edge secure.
I. Top stitch pocket onto lining along short edges and bottom. Ensure the sewing secures the turned-in edge.

4.
Take shirt bag pieces and place right sides together. Pin in place. With 5/8" seam allowance, sew along sides and bottom.
Pinch 1 corner of bag and fold onto itself (see photo). Measure 1.5" (4cm) from corner point down seam and pin in place. Sew across. Repeat for other corner.

5.
Repeat step 4 for lining bag pieces.

6. Straps
A. Cut 4 strips of shirt fabric (I used the sleeves of the shirt) 2.5" x 12".

B. Repeat with lining material

C. Place two shirt strap pieces right sides together and sew along one edge (I use the width of my machine foot as the seam allowance). Do
the same with the other two shirt strap pieces.
D. Repeat 6c for lining straps

E. Place one shirt strap with one lining strap, right sides together. Pin in place. Sew along both long edges (again, use machine foot width
as seam allowance). Turn right sides out.
F. Repeat 6e for other strap pieces.

G. Top stitch 4 evenly spaced lines along length of each strap. Use longest stitch length. See photo for guide.

7. Constructing Bag
A. With shirt bag wrong side out, put lining bag inside so that right sides are facing.

B. Place one strap piece between shirt and lining. Position strap ends to line up with bag top and 2" away from edge on either side of bag.
Pin in place. Make sure strap isn't twisted inside!


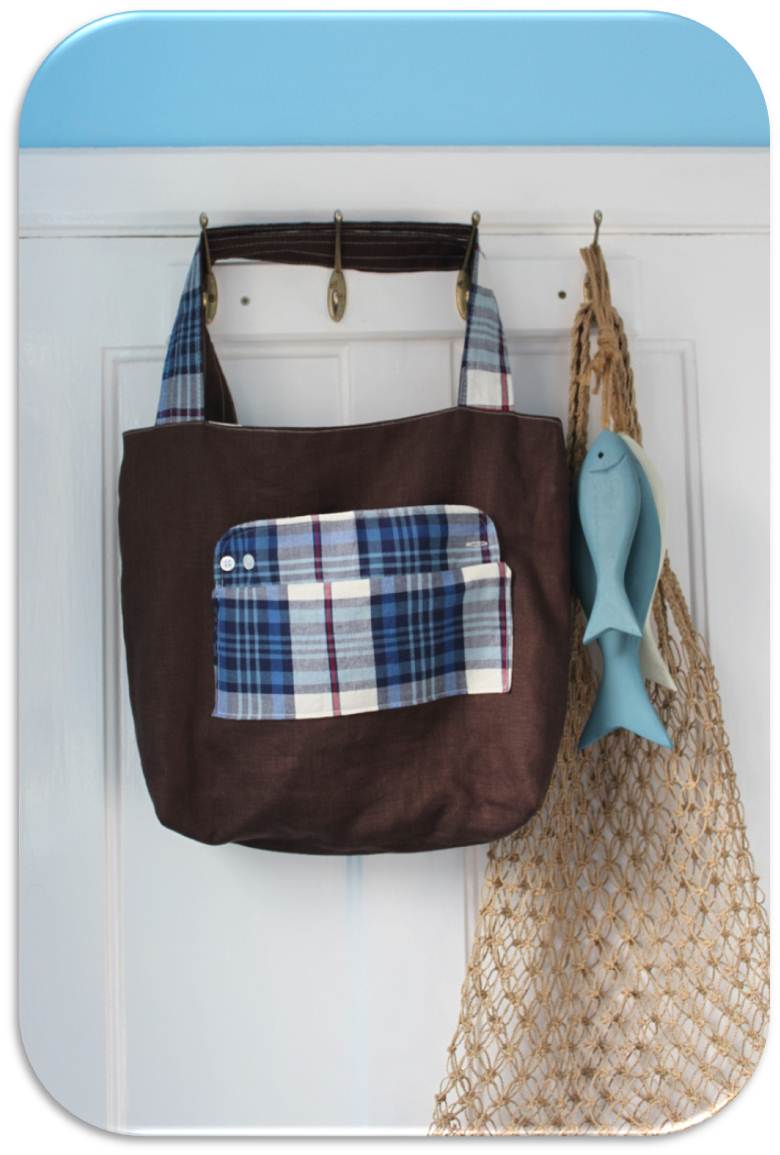

Vous aurez besoin d’une chemise d’homme, assez large!, de doublure (76 cm x 86 cm et 25 cm x 30 cm) et de l’entoilage
.
1. Coupez 2 rectangles de 38cm x 43cm dans la chemise (en positionnant bien les boutons si vous souhaitez les recycler dans le projet). Les dimensions données sont celles qui correspondent à
la chemise, Suzie voulant maximiser la taille du cabas. Il faut donc adapter les mesures données à la chemise que vous recyclez !
2. Coupez 2 rectangles de la même taille dans la doublure (qui peut être une autre chemise par ailleurs)
3. Pour la poche, coupez un poignet et un rectangle 4 cm plus large que le poignet et de hauteur 24 cm environ.
Entoilez la poche sur la moitié (avec un rectangle d’entoilage de la taille de la poche finale, telle qu’elle sera une fois finie): pliez la poche et posez l’entoilage sur la ligne de pliure,
au centre donc et en la centrant dans le sens horizontal. Enfin, entoilez.
Retournez la poche et assemblez le poignet sur le haut, endroit contre endroit.
Repliez la poche en deux (en prenant le poignet en sandwich). Epinglez et coupez les coins.
Piquez 2 côtés (sur les pointillés bleus de l’image 3E/F) et retournez par le côté non cousu.
4. Posez la poche sur un des rectangles de doublure et surpiquez.
5. Assemblez les deux rectangles de chemise sur les côtés et sur le dessous. Préparez les coins en piquant en diagonale à 4 cm du coin, pour les deux côtés.
Faites la même chose pour la doublure.
6. Pour les bandoulières, coupez 4 bandes de tissu de 6 cm sur 30 (dans les manches), ainsi que dans la doublure.
Assemblez deux rectangles pour obtenir 2 longues bandes de tissus et de doublure puis assemblez les bandes envers contre envers avant de retourner et de surpiquer.
7. Insérez la doublure dans le sac, endroit contre endroit.
Placez les bandoulières entre la doublure et le sac, à 5 cm des bords: épinglez et vérifiez que les bandoulières ne se croisent pas à l’intérieur du sac.
Epinglez les bords du sac et de la doublure. Piquez et laissez une ouverture de 6 cm.
Retournez et surpiquez le haut du sac.
Retrouvez toutes les images sur le blog de Su Sews So-So.
Alors en français cla donne:
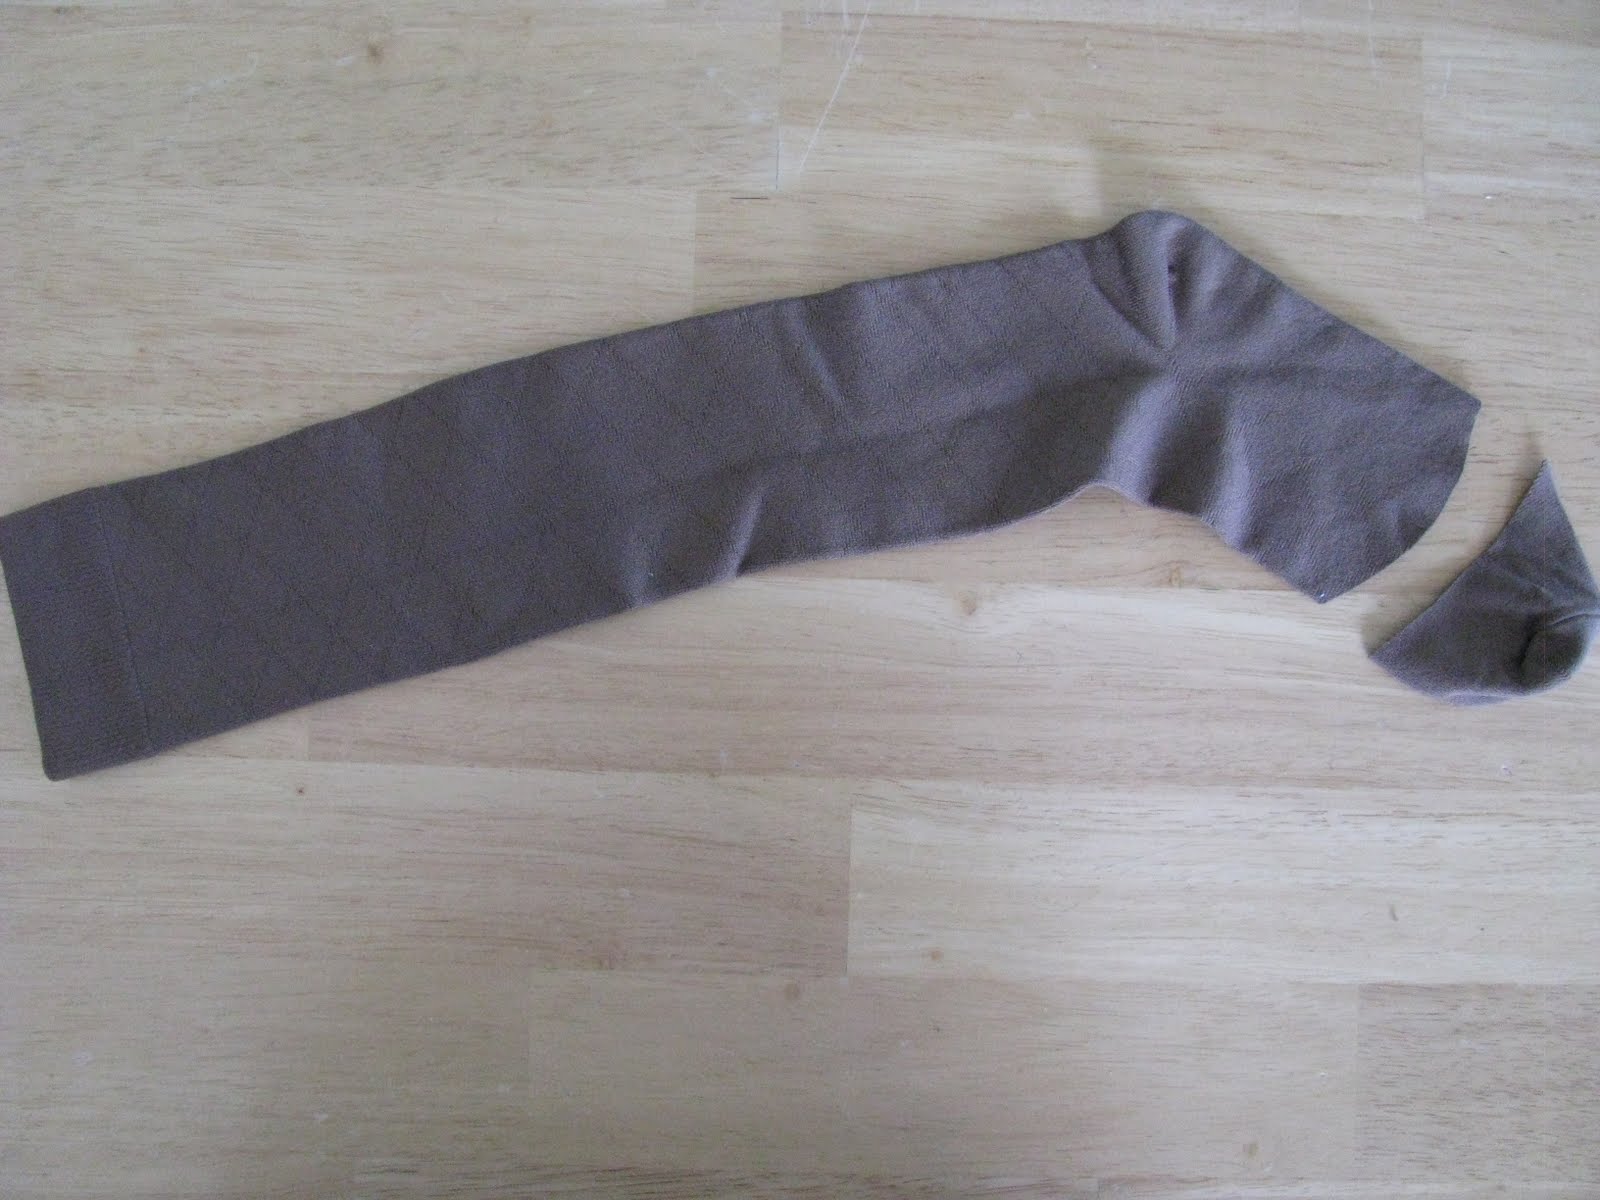
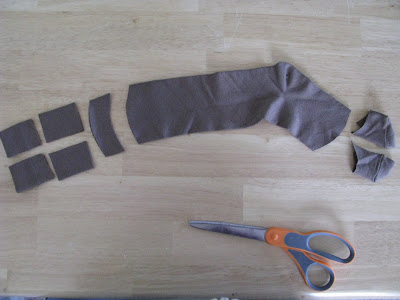
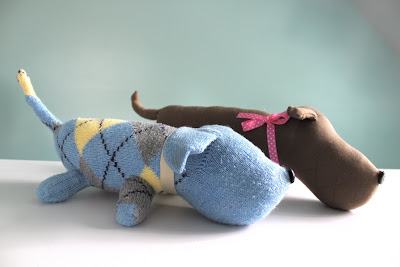
One men's sock (the bigger the better!)
Sewing machine (optional)
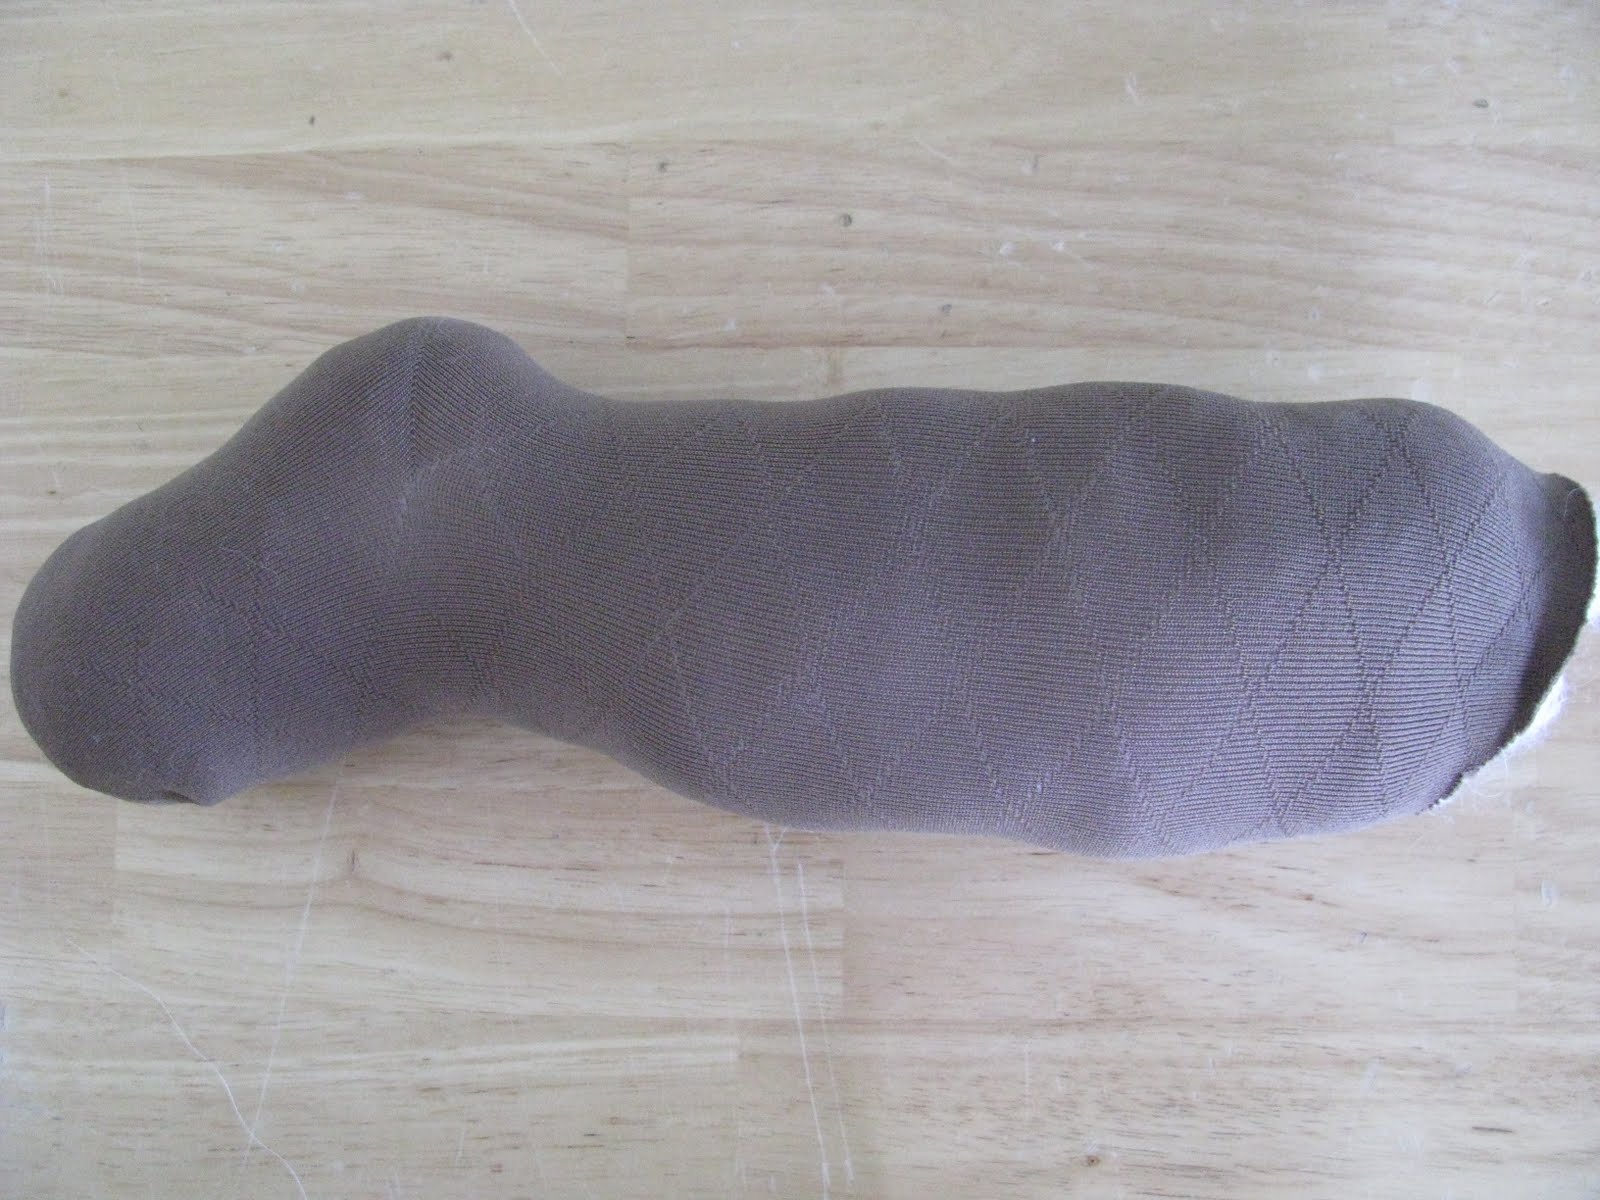
 So, here's what you're starting with. The heel of the
sock will be the top of Bertie's head. There are really four parts to this process: ears, body, tail and legs. I'll organize this tutorial that way so you don't get too confused.
So, here's what you're starting with. The heel of the
sock will be the top of Bertie's head. There are really four parts to this process: ears, body, tail and legs. I'll organize this tutorial that way so you don't get too confused. Ears: Cut the toe of the sock off about 1.5 - 2 inches in a slight arch, the more of the toe you
cut off, the floppier her ears will be.
Ears: Cut the toe of the sock off about 1.5 - 2 inches in a slight arch, the more of the toe you
cut off, the floppier her ears will be.
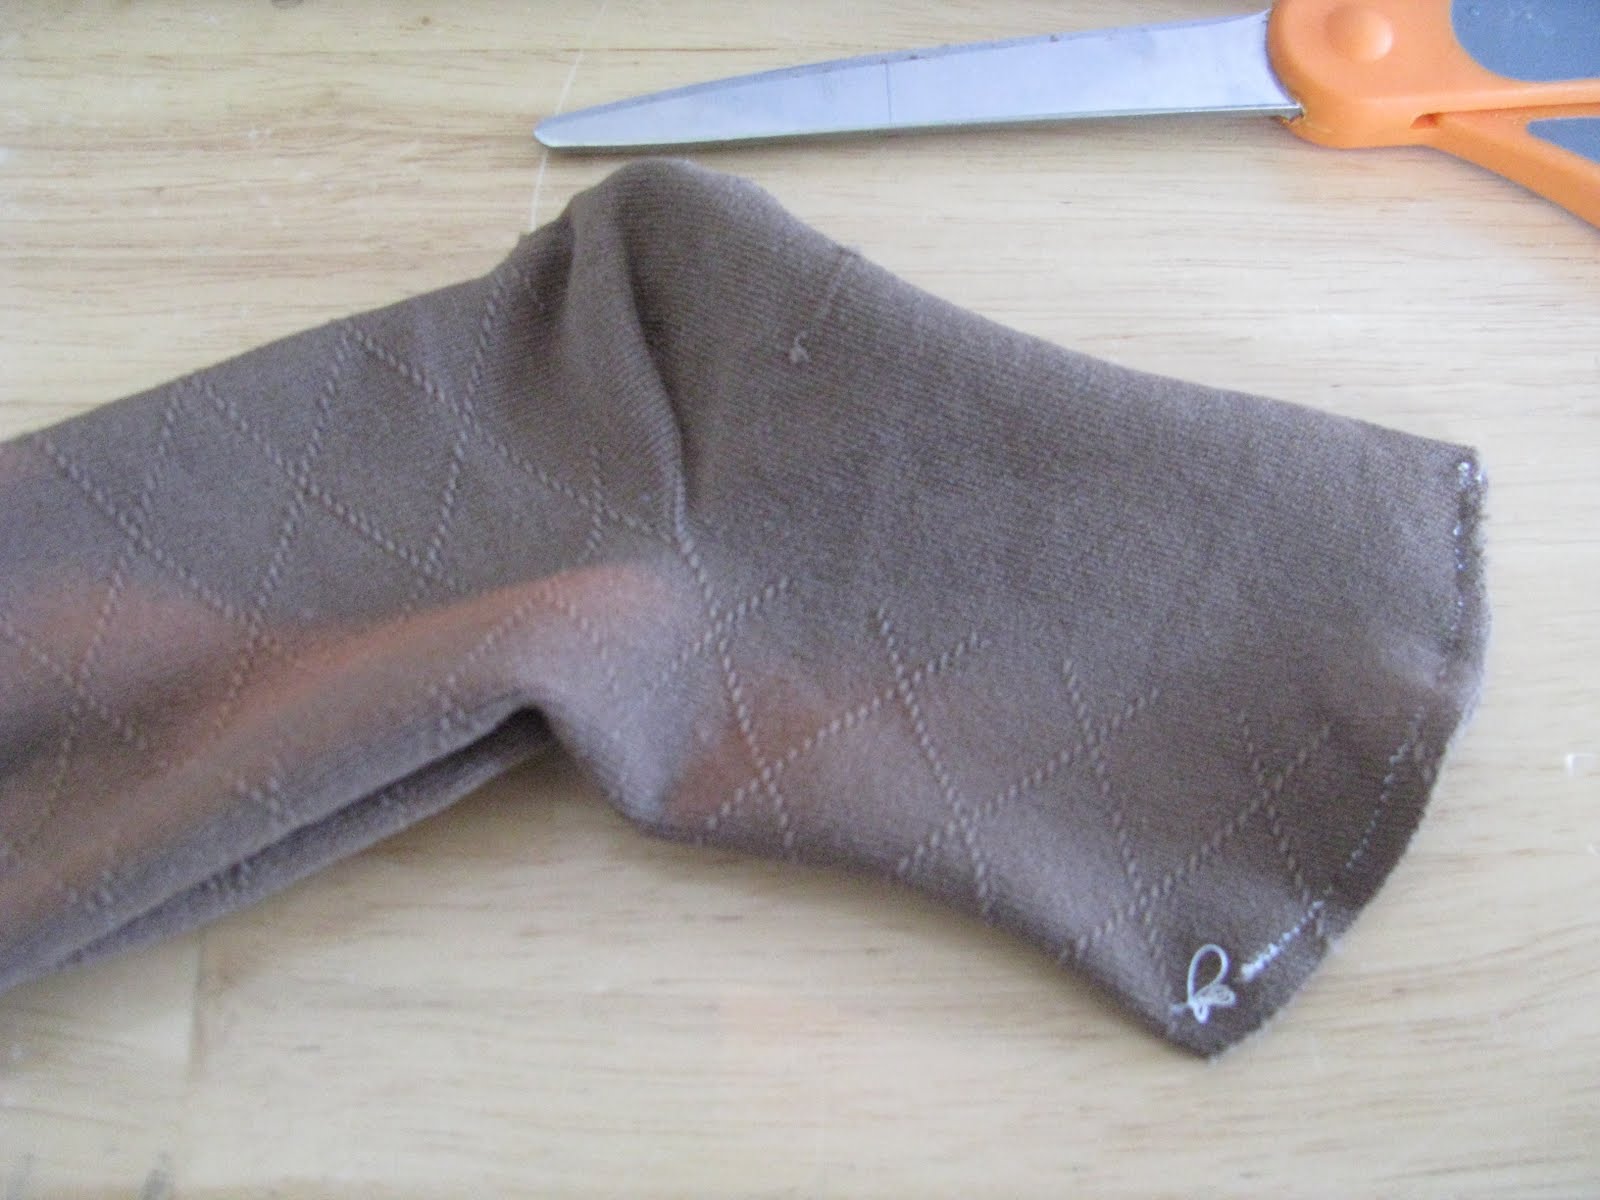
 Now comes the tricky part. If the toe of the sock were a
bowl, cut down the center of the bowl.
Now comes the tricky part. If the toe of the sock were a
bowl, cut down the center of the bowl.
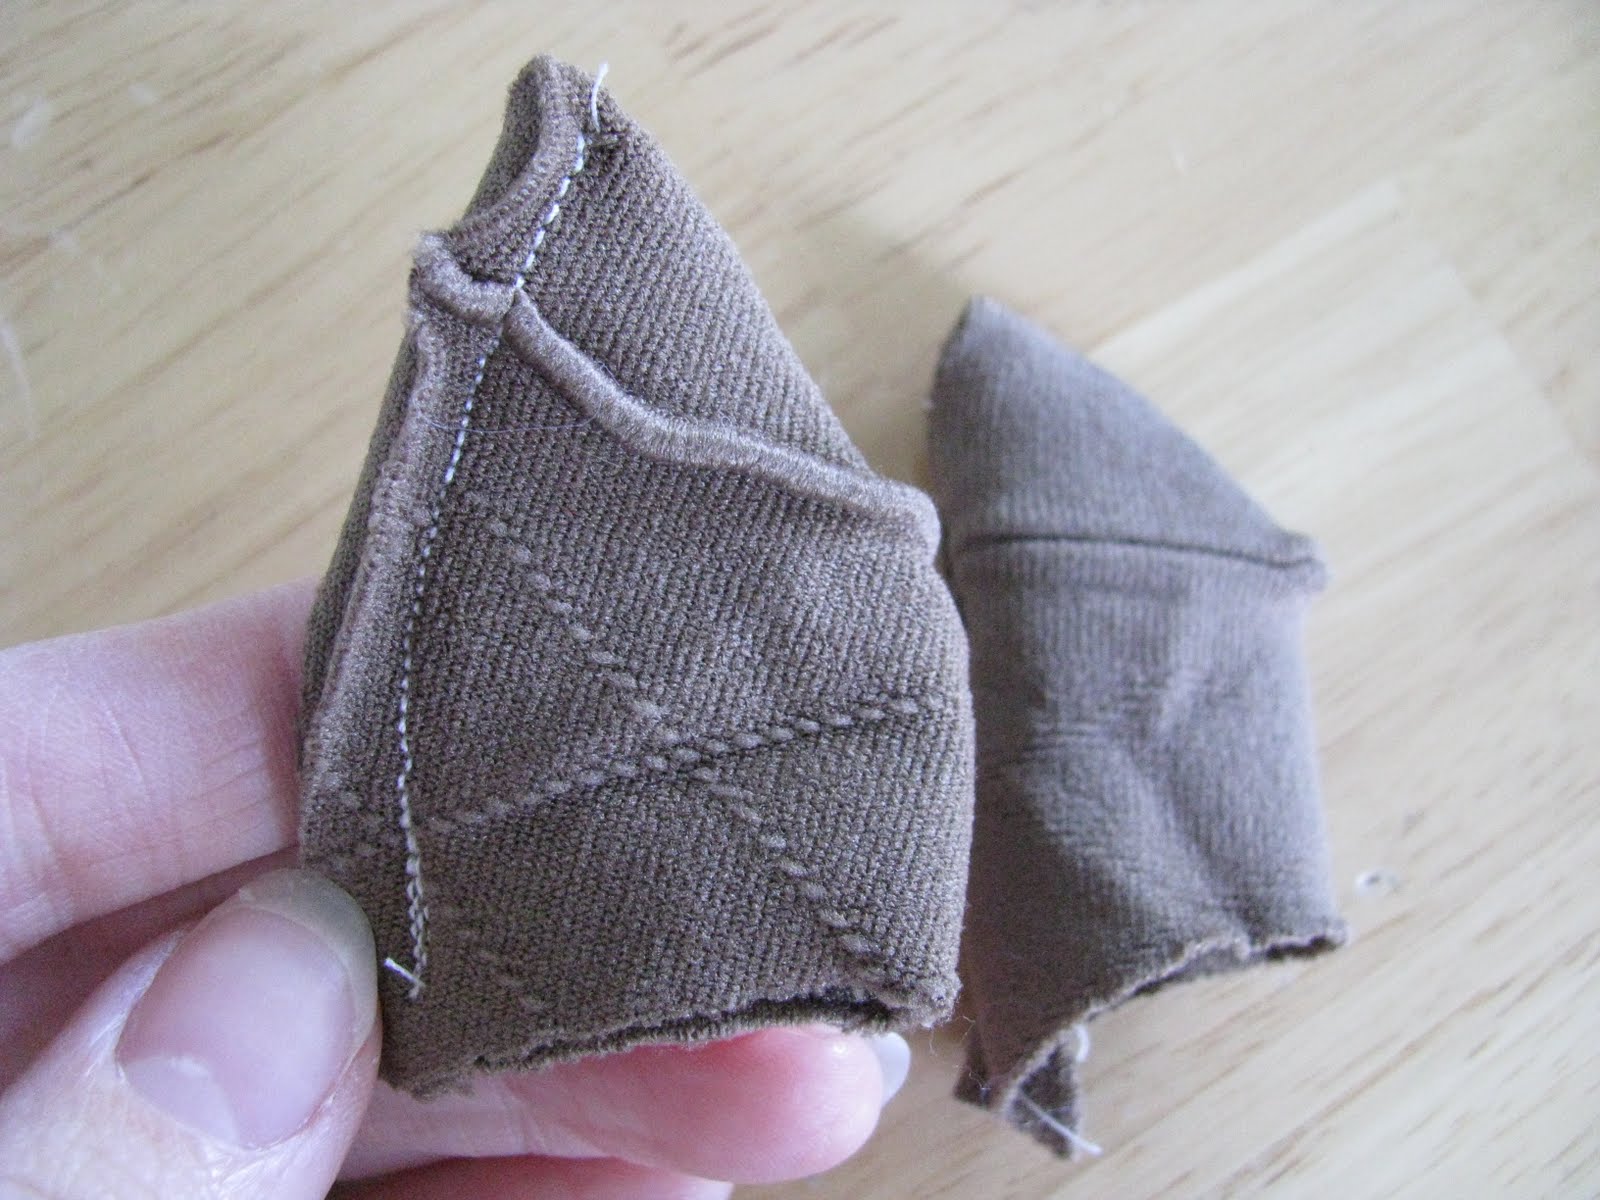
 Separate the two halves of the toe of the sock and fold
them in half with the right sides of the sock facing each other. I'm pointing to what it looks like before it is folded in half. The one below my hand is what it looks like folded.
Separate the two halves of the toe of the sock and fold
them in half with the right sides of the sock facing each other. I'm pointing to what it looks like before it is folded in half. The one below my hand is what it looks like folded.
 With your sewing machine, sew along the straight edge,
leaving as small a seam allowance as possible. You'll finish by turning these inside out. The ears will not be stuffed, so you can set them aside until the body is done and you can sew them on.
With your sewing machine, sew along the straight edge,
leaving as small a seam allowance as possible. You'll finish by turning these inside out. The ears will not be stuffed, so you can set them aside until the body is done and you can sew them on.
 Each time you stuff a limb or her leg I would recommend
pinning it like I did below before you stitch it on. The trick is to slightly tuck the edges in a bit and then whip stitch it closed.
Each time you stuff a limb or her leg I would recommend
pinning it like I did below before you stitch it on. The trick is to slightly tuck the edges in a bit and then whip stitch it closed.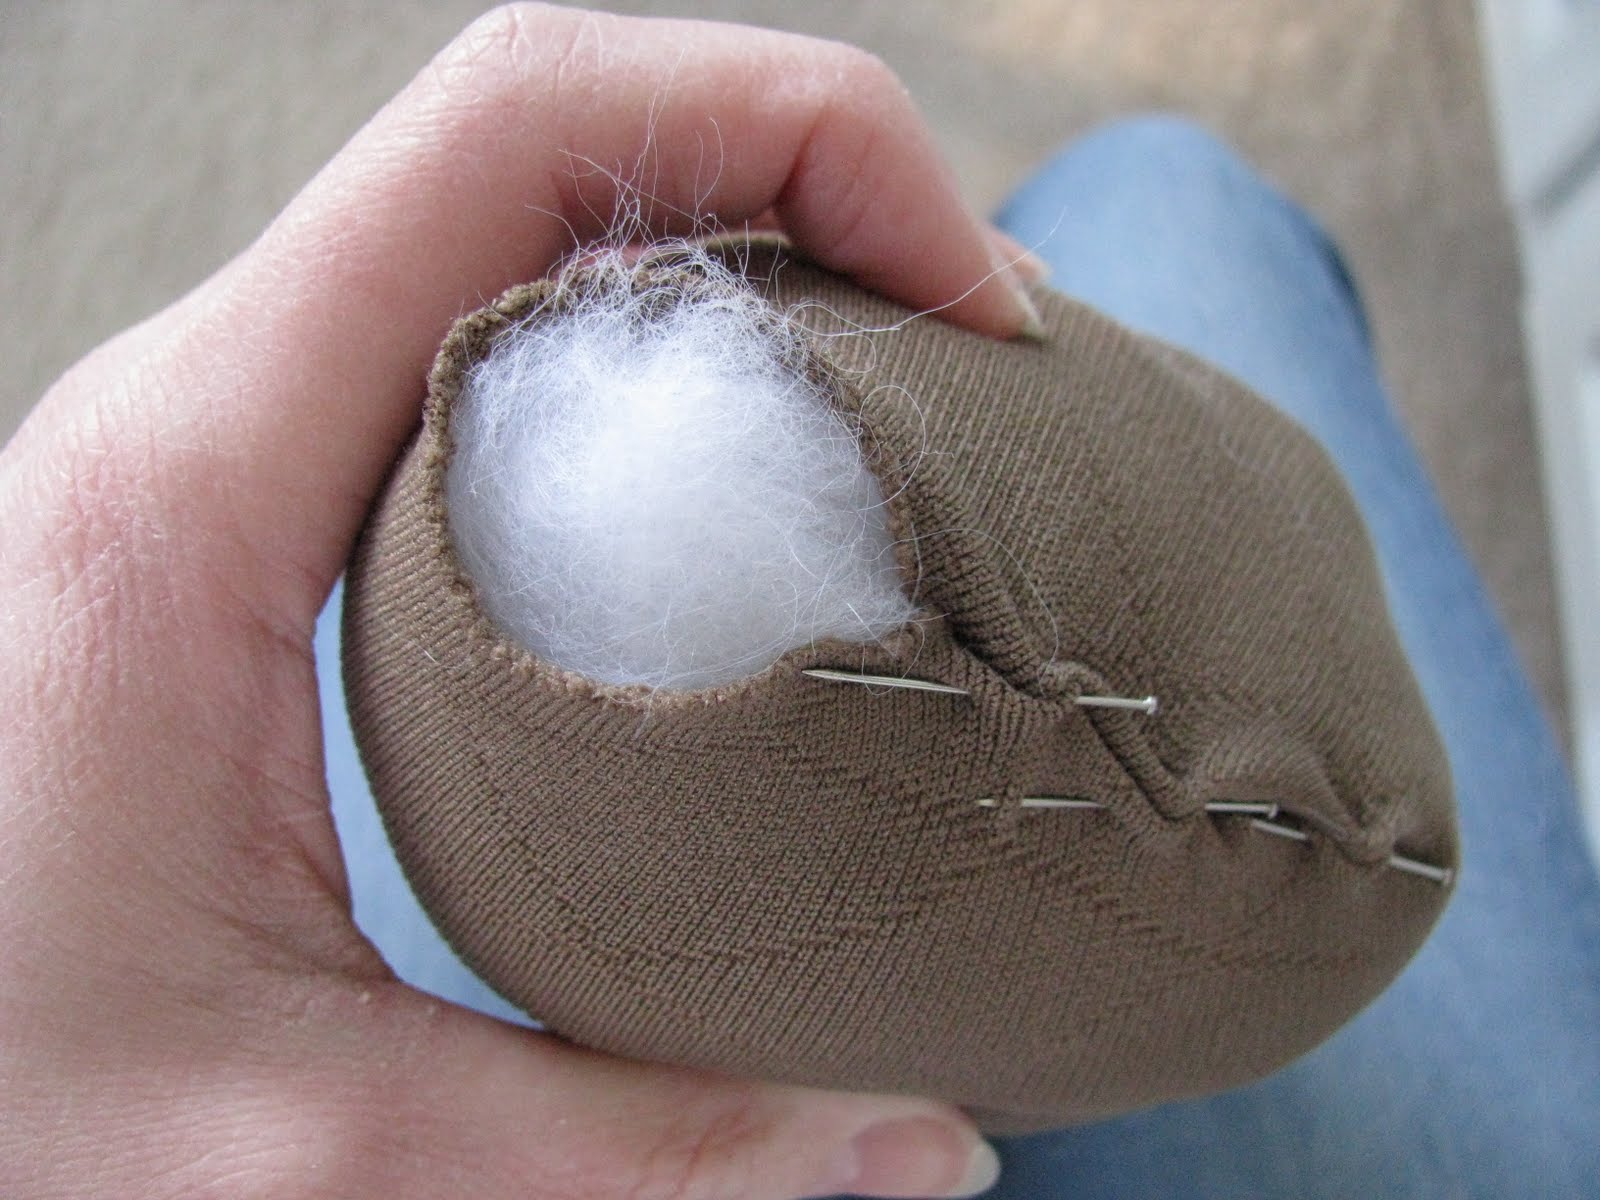 Tail: Grab the portion of the sock that you cut for the tail. It should be a full loop, so cut
one end of the loop, turn it so that the right sides of the sock are facing each other and stitch up the sides with your sewing machine like the picture below. Be sure to leave an opening so that
you can stuff the tail.
Tail: Grab the portion of the sock that you cut for the tail. It should be a full loop, so cut
one end of the loop, turn it so that the right sides of the sock are facing each other and stitch up the sides with your sewing machine like the picture below. Be sure to leave an opening so that
you can stuff the tail. 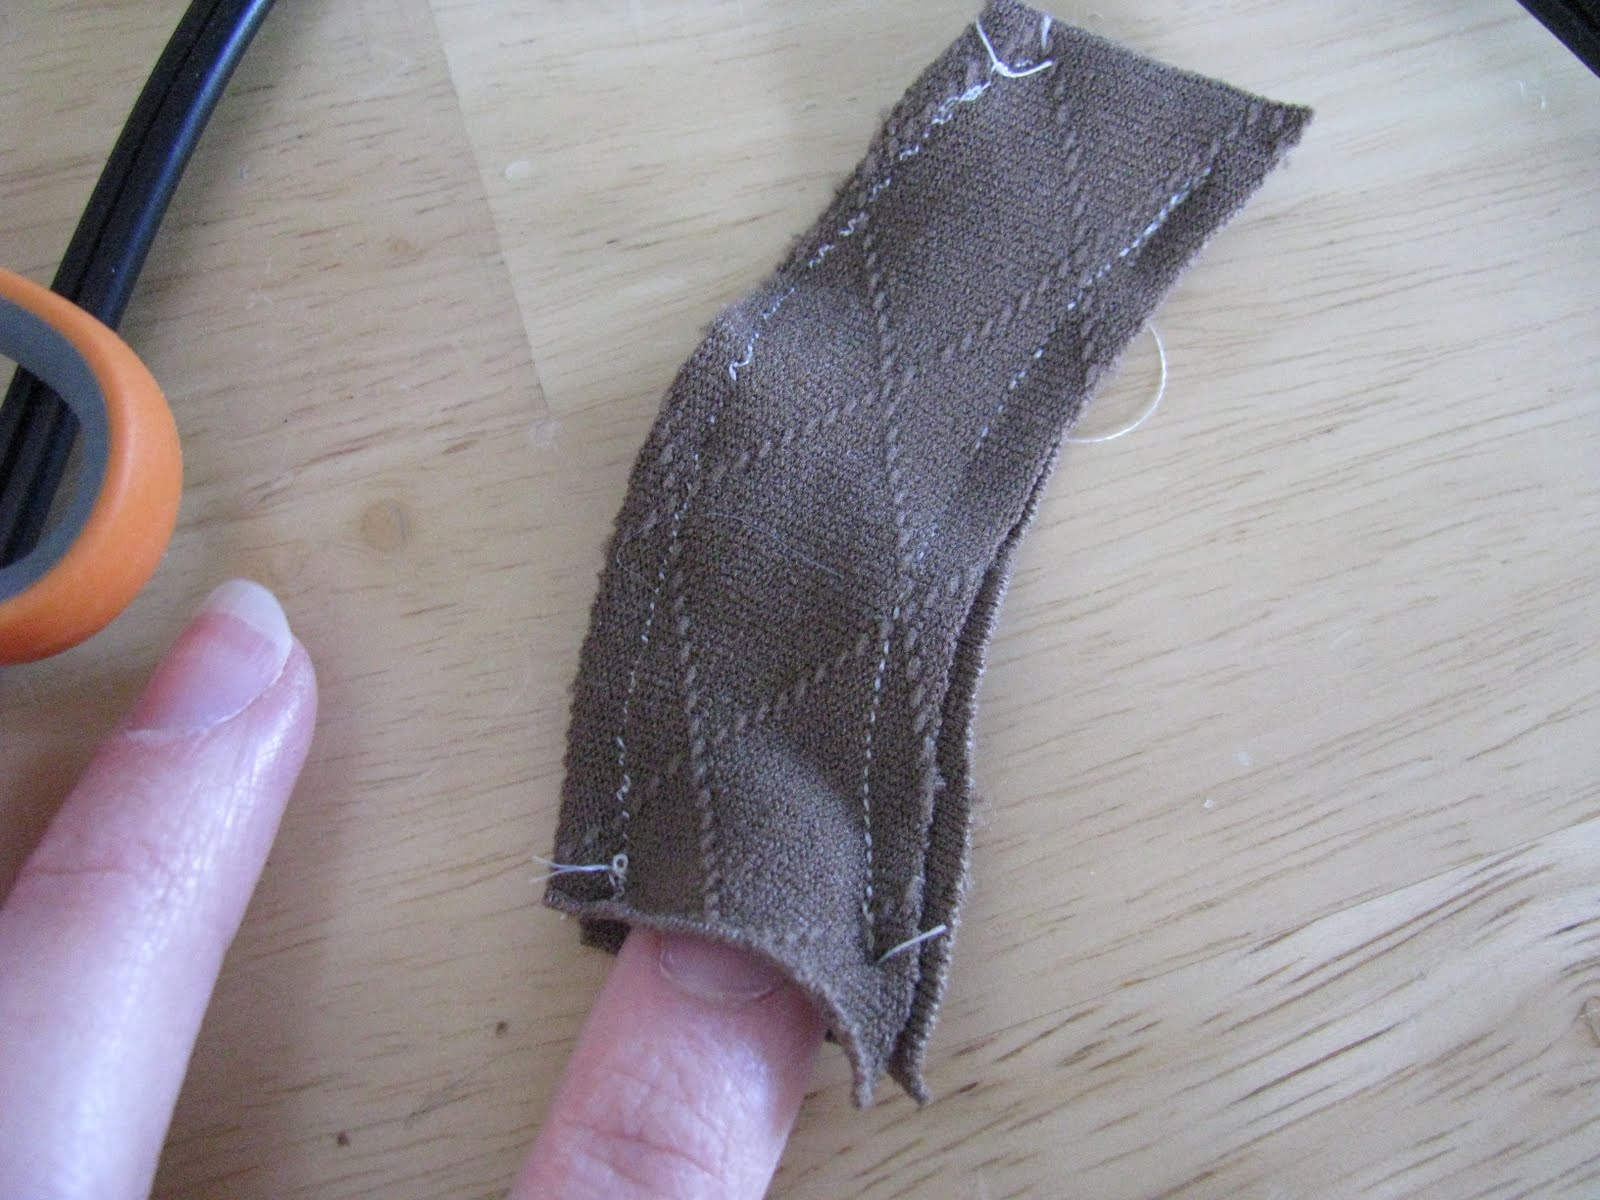 Turn the tail inside out and it will look like this,
ready for stuffing. (Stuffing the tail isn't easy, I would recommend that you use a small amount of stuffing and stick it in with a chop stick little by little.)
Turn the tail inside out and it will look like this,
ready for stuffing. (Stuffing the tail isn't easy, I would recommend that you use a small amount of stuffing and stick it in with a chop stick little by little.)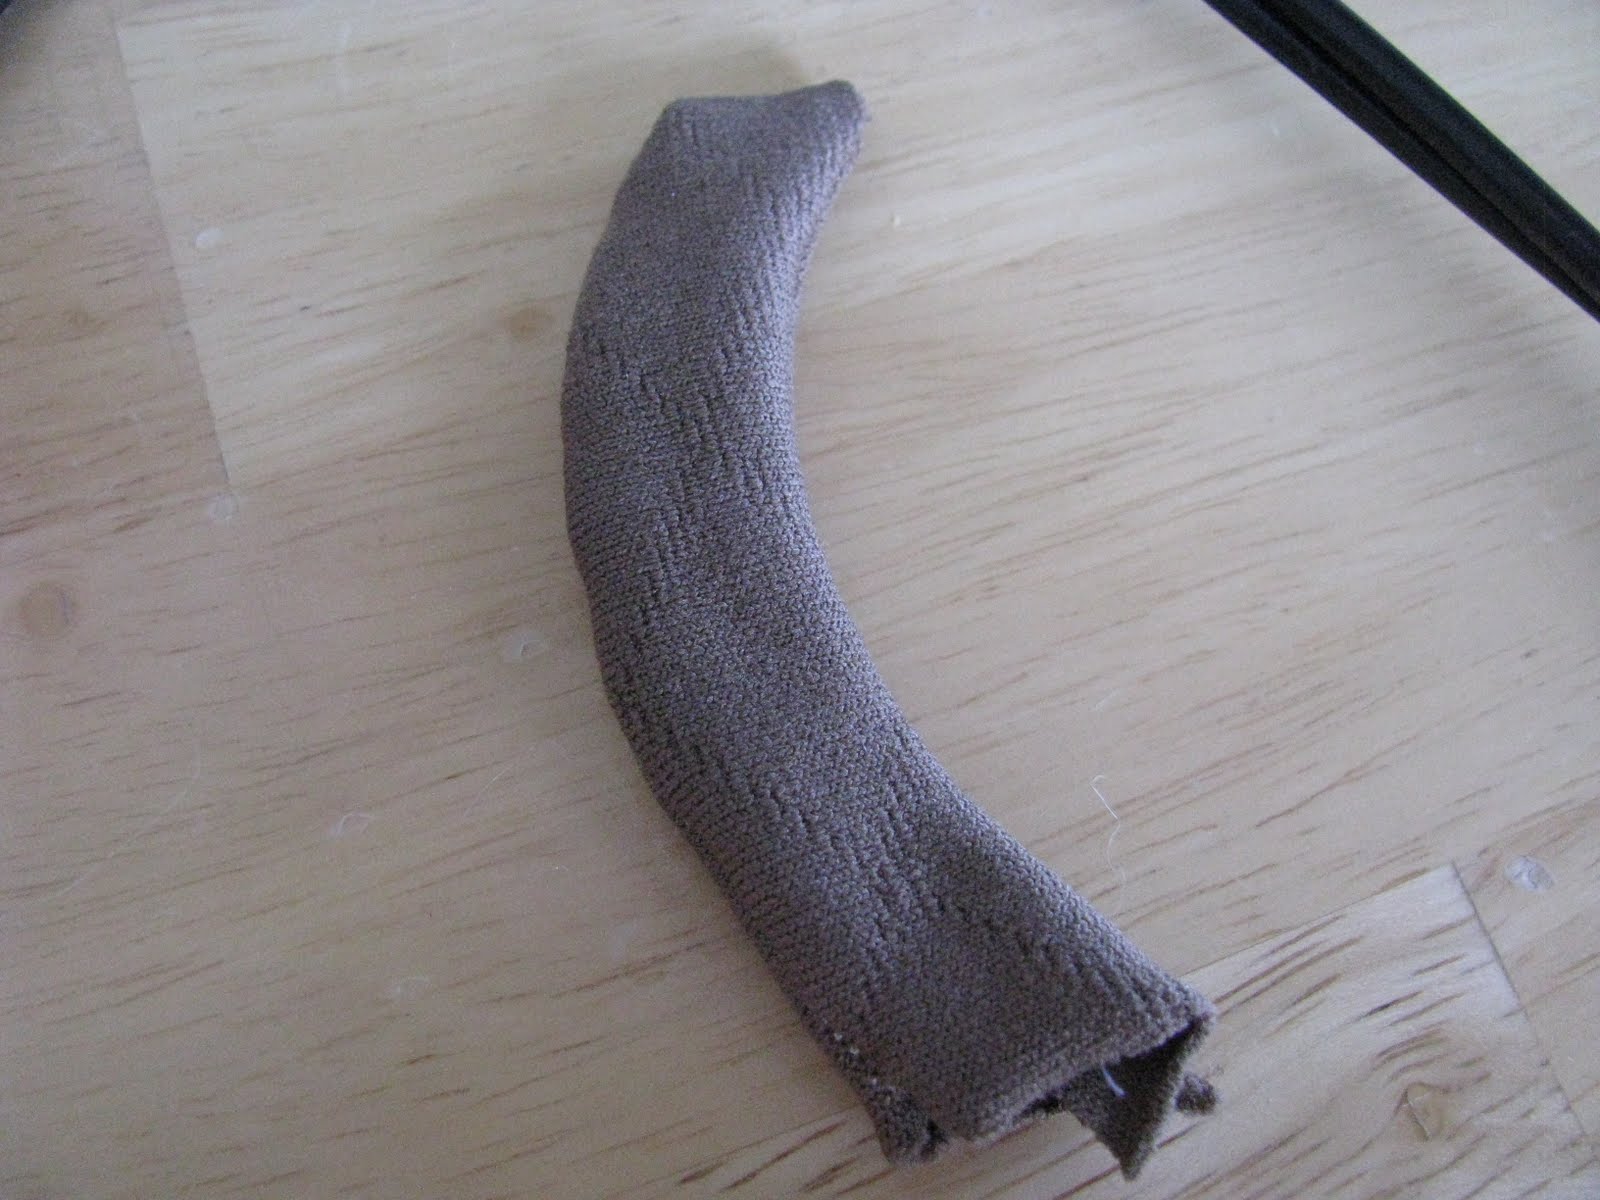 Legs: With each of the four legs, you will sew along three of the sides of the rectangle, leaving
one of the short ends open. Just like the other appendages, make sure the right sides of the sock are facing each other, sew, flip it inside out, stuff, pin to the body, and whip stitch it
on.
Legs: With each of the four legs, you will sew along three of the sides of the rectangle, leaving
one of the short ends open. Just like the other appendages, make sure the right sides of the sock are facing each other, sew, flip it inside out, stuff, pin to the body, and whip stitch it
on.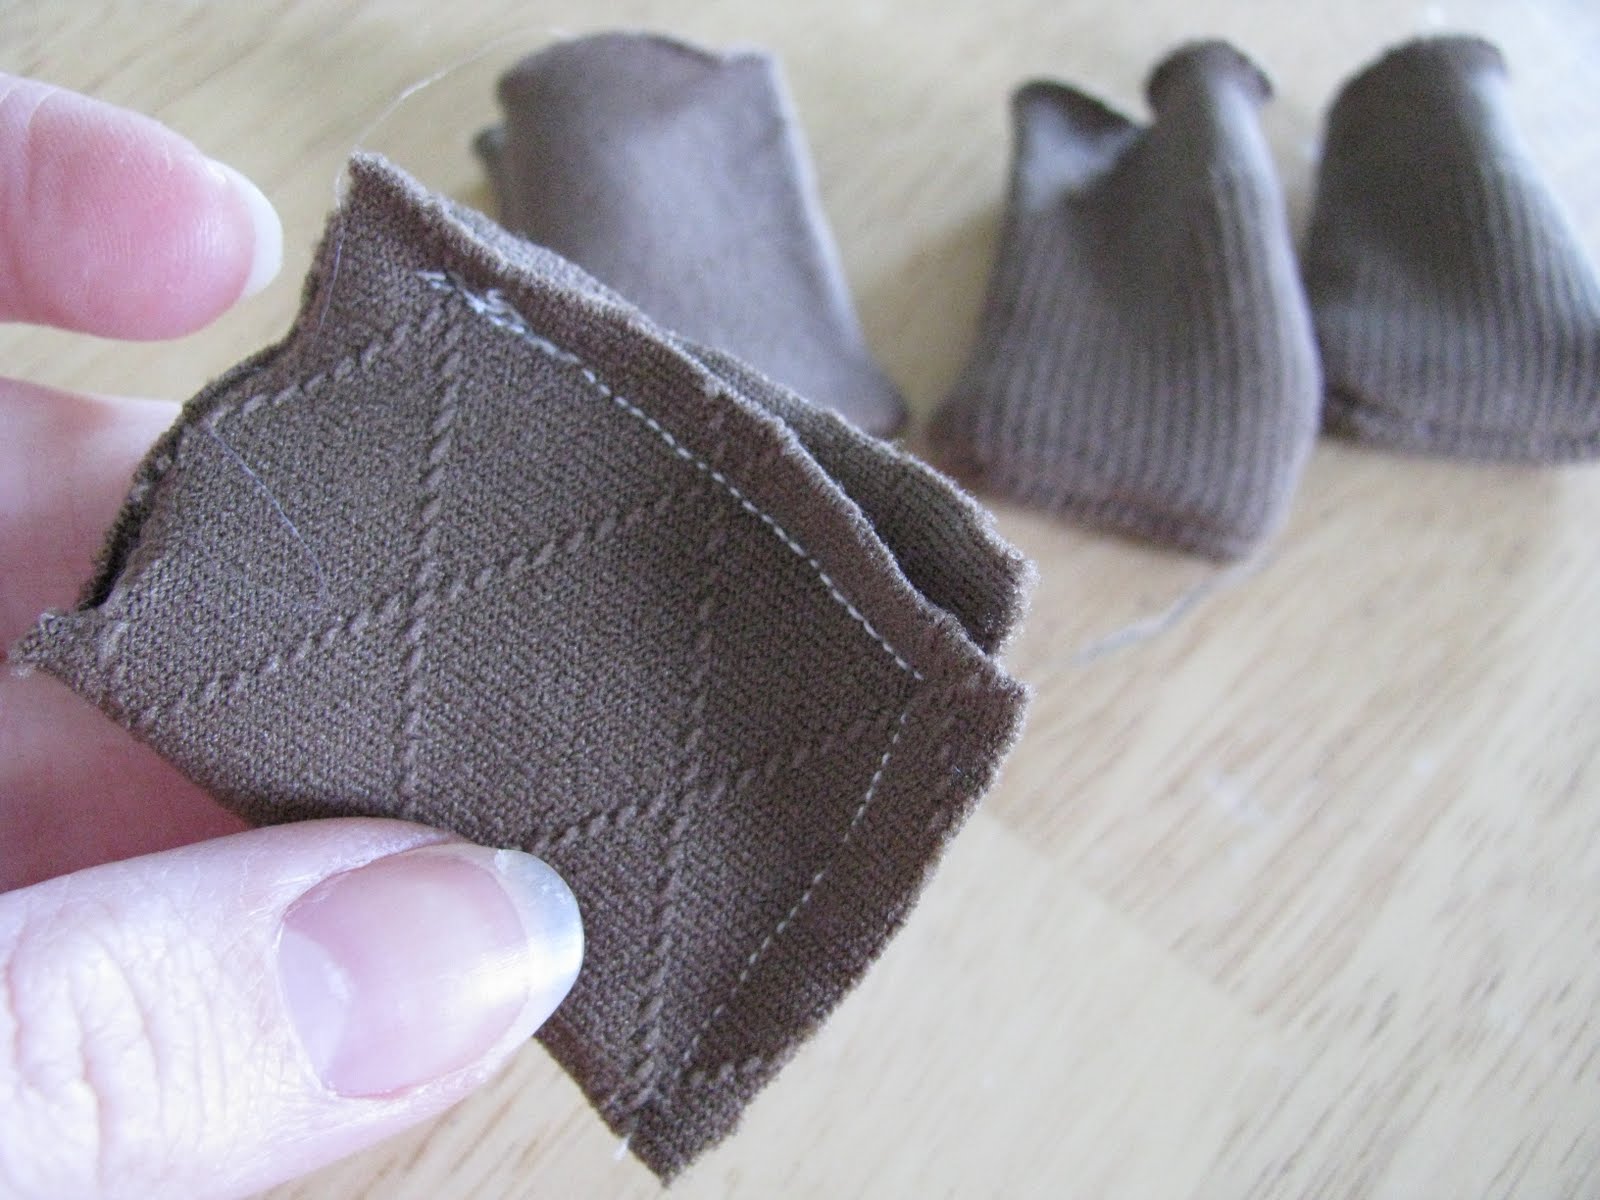 You can finish with a button nose or some eyes and a
collar. Share with your favorite wee one!
You can finish with a button nose or some eyes and a
collar. Share with your favorite wee one!
Tailles 36, 40, 42
Matériel :
2m20 de velours de laine écru en 140 cm de large - 2m0 de popeline de coton en 140 cm de large - 3 boutons recouverts de lainage, diamètre 24 mm - craie - tailleur - fils assortis
Lainage écru et popeline : Citronille
Boutons : Entrée des Fournisseurs
COUPE
Reproduire le schéma sur du papier de soie quadrillé. 1 carreau sur le schéma = 1 cm
Découper les pièces du patron en papier de soie. Poser sur lainage plié en deux, endroit contre endroit. Maintenir à l'aide d'épingles. Couper tout autour de chaque pièce du patron. Les rentrés de coutures de 1cm sont compris. Marquer les repères de montage sur le tissu avec une craie tailleur. Procéder de la même façon pour les pièces à couper en popeline pour la doublure.
MONTAGE
Entoilez une des pièces du col en lainage en plaçant la pièce en popeline sur l'envers de la pièce en lainage. Bâtissez tout autour de ces deux pièces pour les maintenir ensemble lors de la suite du montage.
Assemblez les pièces du col, endroit contre endroit. Bâtissez puis piquez en pivotant dans les angles. Recoupez les rentrés de couture et crantez les angles. Retournez le col sur l'endroit.
Assemblez les corsages devants et dos, endroit contre endroit. Bâtissez les coutures d'épaule puis piquez. Bâtissez les coutures de côté puis piquez. Procédez de la même façon avec les pièces en popeline pour la doublure.
Pliez les manches endroit contre endroit. Bâtissez les coutures de dessous de manche. Piquez. Procéder de la même façon avec les manches en doublure.
Bâtissez les manches aux emmanchures du corsage, endroit contre endroit, en faisant correspondre les coutures de dessous de manche avec les coutures de côté du corsage et en faisant correspondre les repères de montage. Piquez les emmanchures. Procédez de la même façon avec les pièces de la doublure.
Assemblez les devants et le dos, endroit contre endroit. Bâtissez les coutures de côté puis piquez. Formez les plis creux des devant et du dos, à la taille, en faisant correspondre les repères. Procédez de la même façon avec les pièces de la doublure.
Assemblez la jupe avec le corsage, endroit contre endroit. Bâtissez la taille en faisant correspondre les repères de montage de la jupe et du corsage et les coutures de côté de la jupe et du corsage. Piquez. Procédez de la même façon avec les pièces de la doublure.
Bâtissez le col à l'encolure du manteau, endroit contre endroit, en faisant correspondre les repères de montage.
Assemblez le manteau et la doublure, endroit contre endroit. Bâtissez les devants de la doublure sur les devants du manteau, (corsage et jupe) sur toute la hauteur de chaque devant, en faisant correspondre les coutures de la taille de la doublure et du manteau. Piquez chaque côté.
Repliez la partie parementure des devants, sur l'envers le long de la ligne de pliure des devants.
Bâtissez la doublure et le manteau, endroit contre endroit, le long de l'encolure, en faisant correspondre les points A, les coutures d'épaule, les milieux dos C du vêtement et de la doublure. Piquez l'encolure, le col sera piqué entre le manteau et la doublure. Recoupez les rentrés de couture à 5 mm de la piqûre et cranter les rentrés de couture. Bâtissez le bas de la parementure à 3 cm du bas du vêtement, perpendiculairement au milieu devant. Piquez puis crantez.
Retournez la doublure à l'intérieur du manteau.
Faites un ourlet de 3 cm au bas du manteau et au bas des manches. Fixer à points invisibles.
Faites un ourlet rentré de 4 cm au bas de la doublure.
Faites un rentré de 0,5 cm au bas de la doublure des manches.
Fixez la doublure sur les ourlets du bas du manteau et des manches, en retrait à 1,5 cm du bord.
Brodez les boutonnières aux emplacements indiqués sur le devant droit et sur le col. Cousez les boutons en vis-à-vis sur le devant gauche.
NB : Si vous souhaitez travailler sur un manteau tout prêt, retrouvez les explications du piquetage dans le magazine, page 134.
Création : Astrid Le Provost pour Citronille, www.citronille.fr
Stylisme : Vania Leroy Thillier
Les patrons:
http://www.marieclaireidees.com/data/fichiers/manteau-blanc-laine-cardeeA.pdf
http://www.marieclaireidees.com/data/fichiers/manteau-blanc-laine-cardeeB.pdf
Pour celle qui le feronts j'attends vos photos moi je vais voir pour le faire cet ete pour l'hiver pour laure et moi!bisous et bonne couture
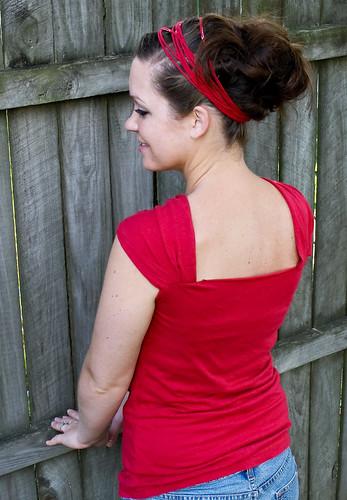
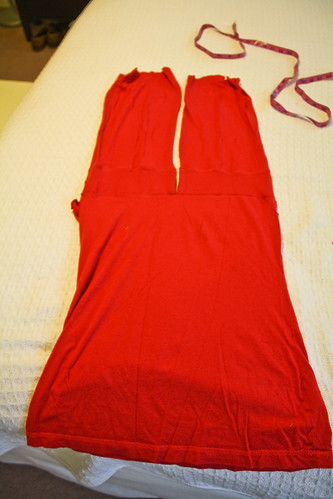
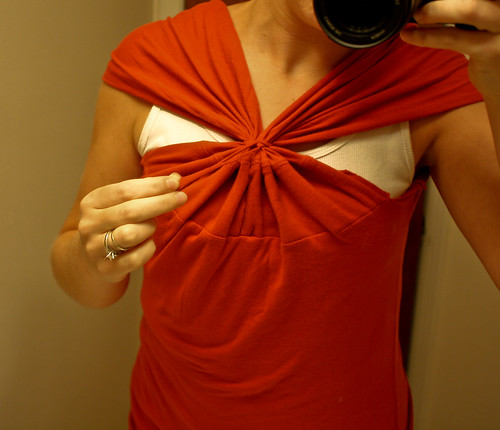
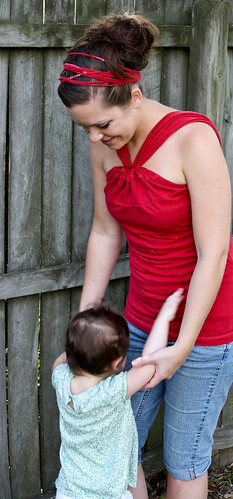
While I was browsing at Anthropologie's website, I came upon this shirt.
 "How cute!" I thought. Then in an
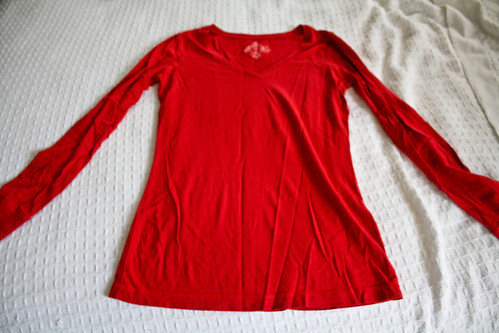
instant, my mind starting going over how to do this myself with a long sleeve shirt. It didn't take me long at all. I used a jersey type of shirt, but you could use a cotton, etc. shirt. There
might have to be a few adjustments though (such as finishing the top seam all the way around). I also added at the bottom how I made the headband from the extra material.
"How cute!" I thought. Then in an
instant, my mind starting going over how to do this myself with a long sleeve shirt. It didn't take me long at all. I used a jersey type of shirt, but you could use a cotton, etc. shirt. There
might have to be a few adjustments though (such as finishing the top seam all the way around). I also added at the bottom how I made the headband from the extra material.

